Elevator pitch
I’m excited to introduce two plist tools for macOS plb the plist broker and plx the plist extractor. The value of plbjpt does for JSON. plbjpt, ljt, jse and shui
Because Reasons, part 1
It was while writing Detecting Apple Intelligence and ChatGPT Integration Status last November, I decided to make a plist tool that could thoroughly map and navigate plist paths, easily extract plain text values and most importantly, effortlessly navigate into plists stored as base64 encoded data. What I thought was a new trend, is actually not: Binary plist data in plists is nothing new and if that’s the case then, it’s about time we have a tool for work with them! Funnily enough, in the above post I complained with an “ATTN: Craig Federighi” about the obfuscation games I felt Apple engineers were playing with the Apple Intelligence prefs as these inscrutable data blobs. Now, in the upcoming macOS 15.4 release, lo and behold those keys have disappeared from .GlobalPreferences! 💥 Um, thanks, I guess? “I see dead keys” now. 😬 “Be careful what you wish for, it might diminish your tool’s relevance!” as they (kinda) say. Still, there’s lots of binary plist data embedded in your preferences, when you run the examples for plb
Because Reasons, part 2
You might still be asking yourself: “Why do we need yet another plist tool though? We have defaults, PlistBuddy, and plutil. Why do we need anything else?!”. Well, let me tell you they all have their strengths and weaknesses:
defaultscan only get the value of a top level key, it does not work with nested paths; it cannot output XML unless it is the entire plist; it converts ISO 8601 dates to local time using abbreviated time zone which are notoriously hard to parse withdate; empty preferences return an error as if they don’t exist; it cannot take piped input; binary data is output as an abridged hex dump- With
plutil -extractthere is no way to extract data from the root of a non-dictionary type plist, a key name is always required; key paths are period delimited, so keys with periods in their name require\\escapes which gets unsightly quickly with when reverse domain style key names are used; the JSON extract method balks at outputting most plist data types (real, boolean, date, data); the-convert xml1function makes it too easy to overwrite the source file if you forget to add the awkward-o -syntax to send to stdout versus the source file PlistBuddyis a mixed bag: it can work with paths; it has a colon delimited key path notation that’s not flummoxed by periods; colons are more easily escaped with a single vs. double slash; it can output XML with-x; however, it cannot process binary plist data; it adds a newline to all output which alters binary output and especially corrupts binary plist data; redirected input requires/dev/stdinto be specified as the file; piped input does not work, only here documents do (awkward looking one-liners ensue)
plb in action
Getting the lay of the land
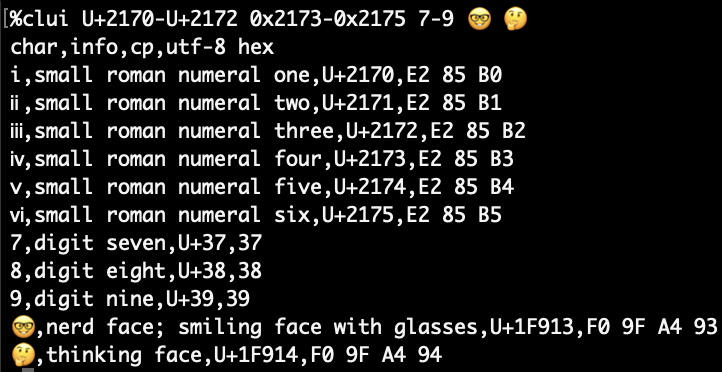
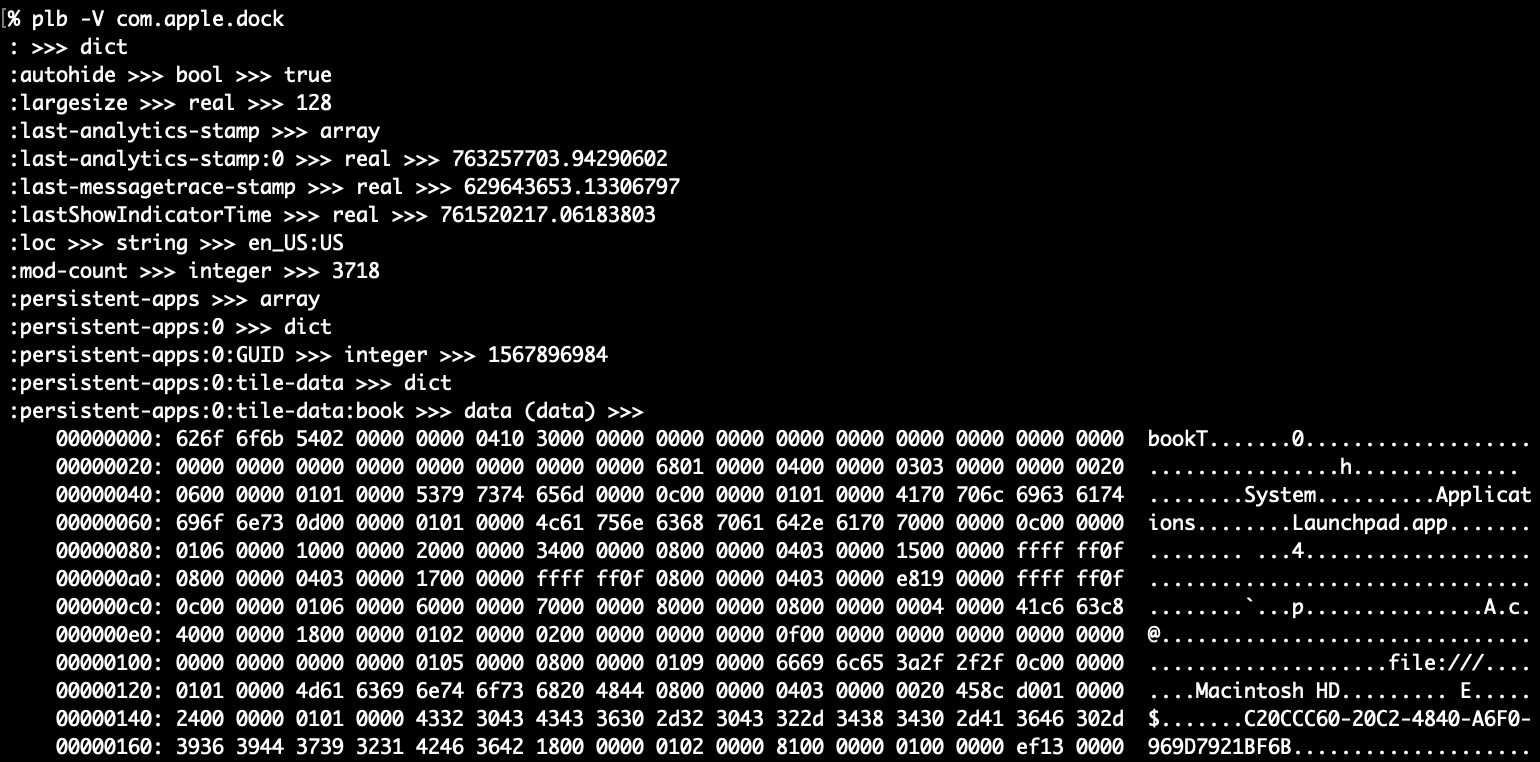
One of the most powerful features came about quite late in development: “crawling”. That is, plbplb -V (which is shorthand for -CCC, the 3rd level of crawl output):
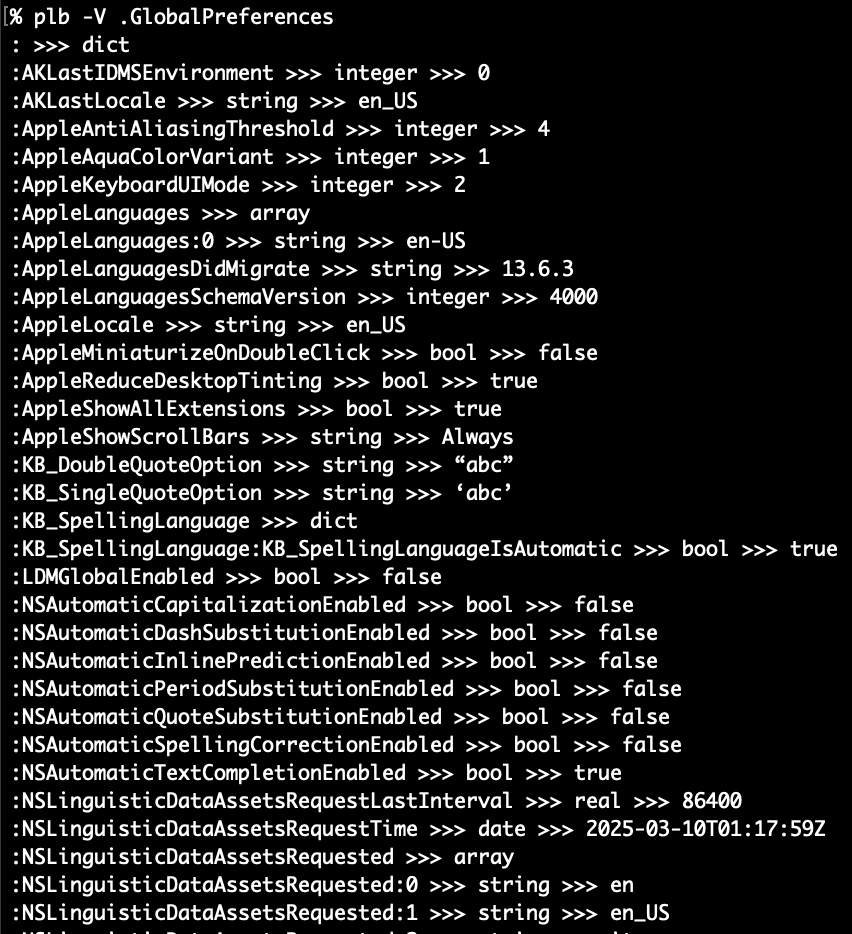
Every simple type, except data, can be seen above: string, bool, integer, real and date. As well as the “complex” types of array and dict. An array’s indices are enumerated and a dictionary will have all paths traced with colons delimiting the path of additional dictionaries and arrays within. Let’s see what happens when we hit some data type nodes:
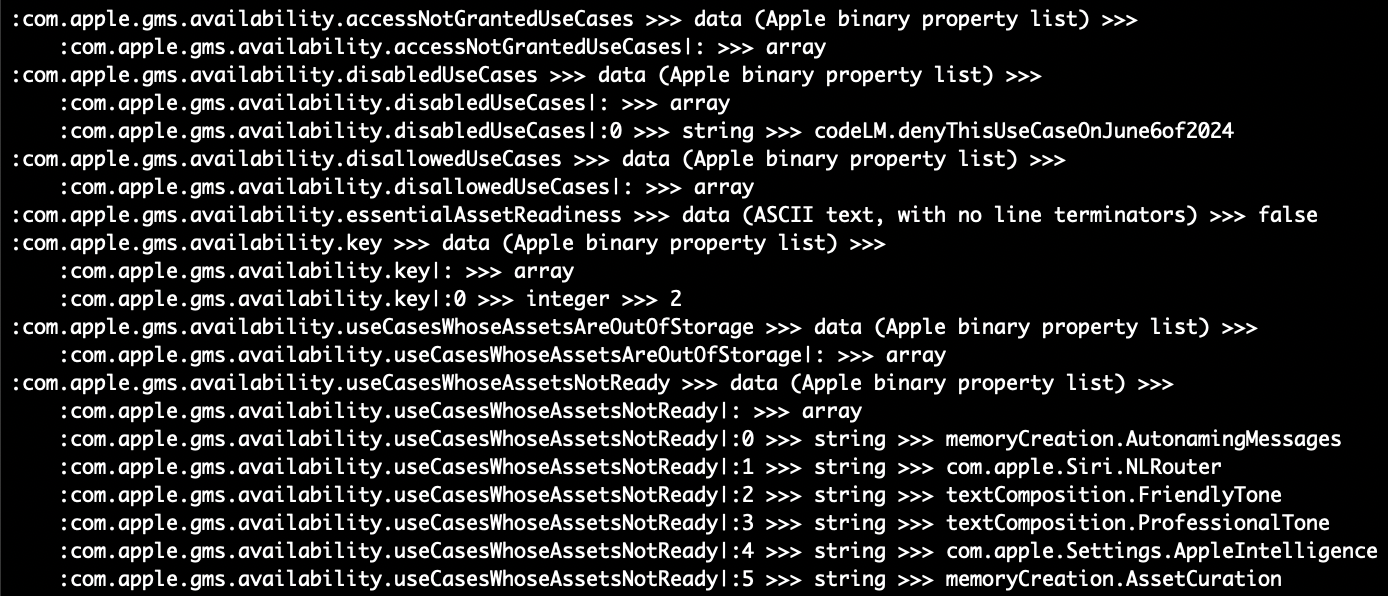
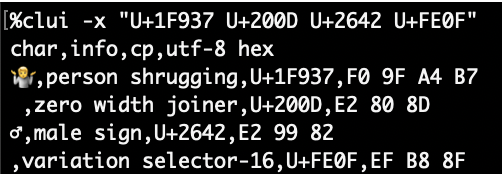
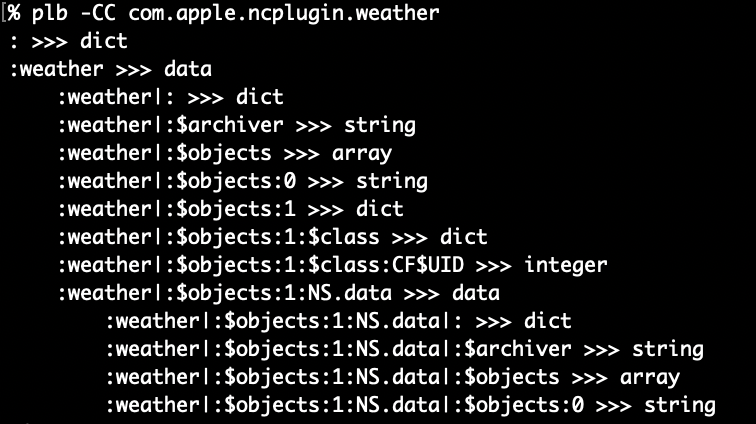
As you can see the -V will cause plb-v will not traverse into plists encoded as data (same with upper/lowercase crawl option -c/-cc and -C/-CC). When this “traversal” occurs, the path is indented for easier visual identification and the pipe character | is used to delimit. In the above pic we can see both empty and populated arrays. There are some preferences like com.apple.ncplugin.weather that have two levels of nesting!
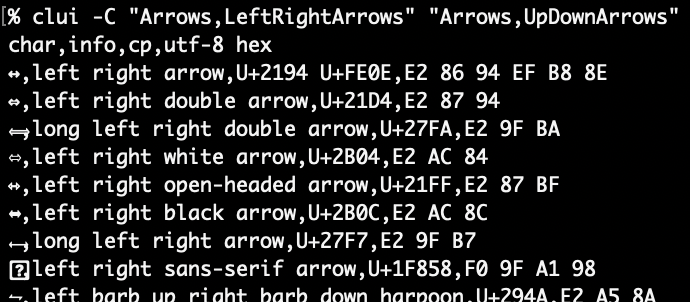
Lastly, here’s what binary data looks like in -v/-V mode. The file type is inside parentheses after data and on the next line(s) are the binary data rendered with xxd
More work with embedded plist data
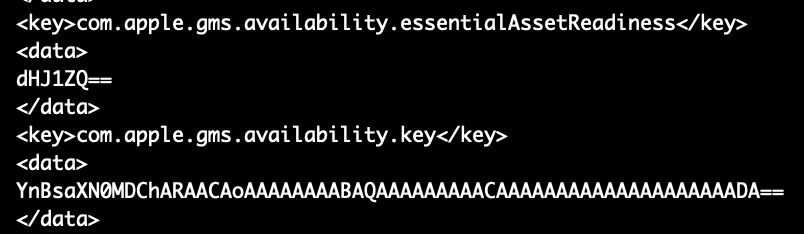
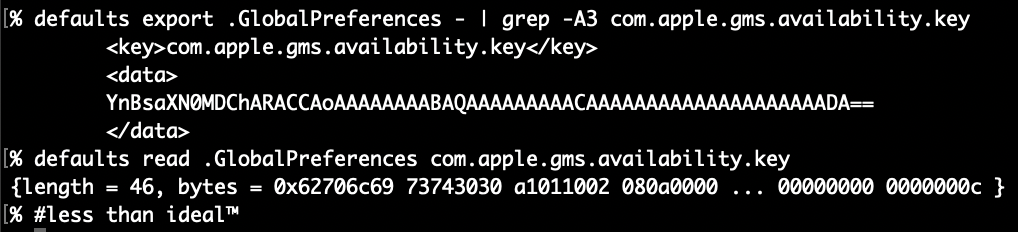
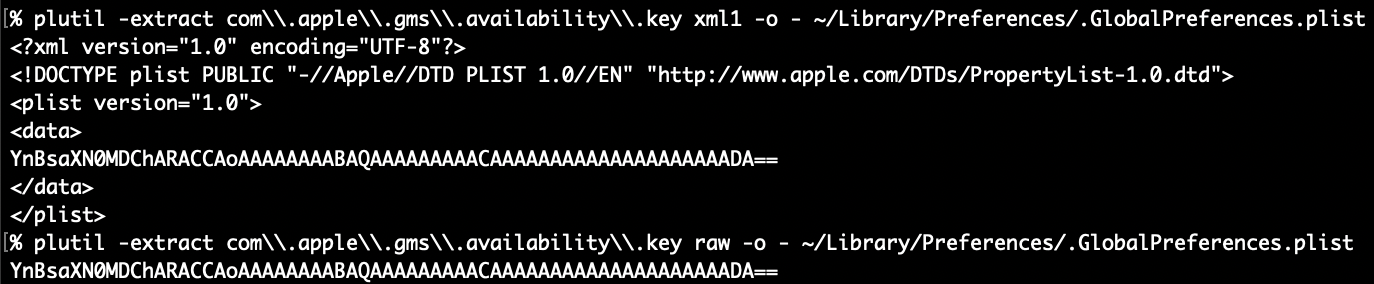
Now that we’ve checked out the “crawling” output, let’s take a look at the key that inspired all this work com.apple.gms.availability.key. You probably won’t find this key on new 15.4 installs but it might hang around if you upgraded from 15.0 to 15.3. In this example, if you ran defaults export .GlobalPreferences - you’d only see the key as a base64 encoded data string and you could get just that key in XML. If you specify the key defaults gives you an abbreviated (and useless) hex dump.
If you use plutil to extract the value of the key, it’d not only require some tedious escaping of the periods but would still only get you the base64 encoded string which would require piping into another plutil command to convert to xml1. Not to mention the -extract syntax always throws me off!

PlistBuddy can kinda output the raw binary plist except it appends a newline to everything, which corrupts the binary plist data and plutil fails. perl can chomp it off or in zsh you can capture the output using command substitution $() since zsh can handle nulls in variables this will strip the extraneous newline but again, you’d still have to convert or extract the value plutil! Instead, let’s check out how easy it is with plbplb -x .GlobalPreferences com.apple.gms.availability.key
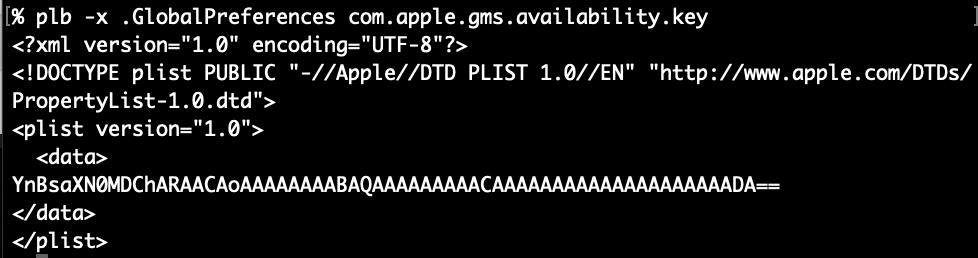
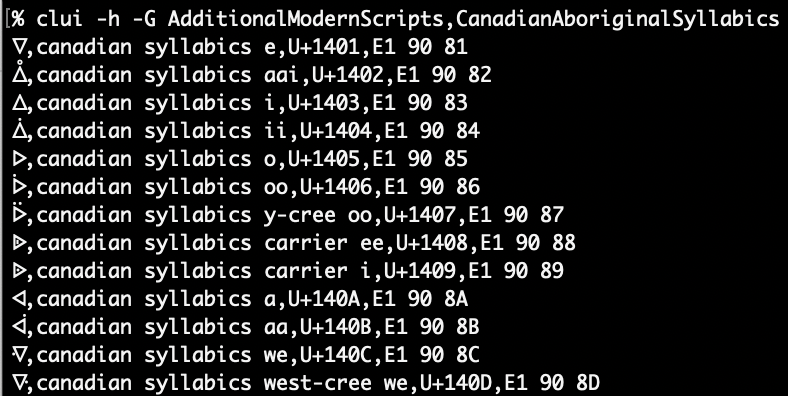
-x ensures XML output and it also keeps the data from being automatically decoded and output as plaintext. How about we “traverse” into the embedded plist data and output it as XML. We simply append a pipe character | to the end of the path, like we saw in the “crawled” paths above. Make sure to either escape or quote the pipe character in the path argument like this (so the shell does not misunderstand): plb -x .GlobalPreferences 'com.apple.gms.availability.key|:’ (the root colon is optional, fyi)

Wow, this is a lot easier already! You can also crawl the key itself with -V and get simple overview

Since the array has only a simple integer value, it will easily output as plain text with this command: plb .GlobalPreferences com.apple.gms.availability.key

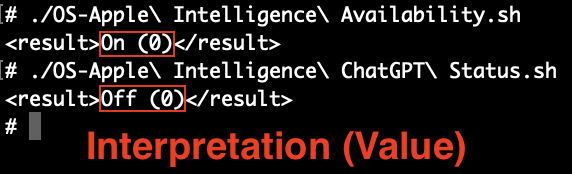
plbLook at that, would you! A simple number from a simple command, neato! BTW: While this key might be going the way of the dodo, the value in macOS 15.0-15.3 indicates (in a roundabout way) that Apple Intelligence is off (2) or on (0) – 1 I think means it’s downloading and installing. I built plbdict or data key will cause output to be XML, otherwise all “simple” types are be output as plain text.
What’s plx for then?
Glad you asked! Despite making plb.min.sh a one-liner minified version, it’s still pretty big at 18k (but down from 36k for the fully commented version!). I can understand if you are embedding that function in your script, you might want something smaller.
plx has the essential feature that plb does: It can dive into nested data plists using the same colon delimited key paths and pipe characters that plbplb
-lfor getting key names within a dictionary or the length of an array- -t for getting the plist type of a node
- -e to convert ISO 8601 dates to epoch
This gets plx.min.sh down below 10k! You might feel better about embedding in your script. Your call. Same easy syntax:

plx: All the output, half the bytes (embedded in your script)Wrapping Up
Check them both out at the plb GitHub repo and the plx GitHub repo. They both have a full sized and commented shell script as well as a one-liner/minified version. In their Releases (plb, plx) you’ll find a macOS package (pkg) download that will install the scripts to a self-named folder in /usr/local/ and then create a symlink to the main script without the .sh extension in /usr/local/bin so you can run it with ease! I hope you get some use out of these.
Homework
Make sure to check out the Advanced Examples in the plb -h help output (also included down below) for some simple loops that can crawl through all your user prefs, you might be surprised at what you find!
#plb Advanced Examples
#zsh only, this ignores comment lines if you copy/paste the examples
 set -k

#add to this comma separated list of large preference domains to skip
skipDomains="com.apple.audio.AudioComponentCache,com.apple.SpeakSelection,com.apple.garageband10,com.apple.EmojiCache,com.apple.audio.InfoHelper"

#1 Get key paths and values for all user preferences
# substitute `plb -D` for ByHost user prefs
IFS=$'\n'; for domain in $(plb -d); do
 #skip large domains
 grep -qE '(^|,)'"${domain}"'(,|$)' <<< "${skipDomains}" && continue
 echo "## Domain: $domain"; echo "## File Path: $(plb -f "${domain}")"; plb -V "${domain}"; echo
done

#2 Get key paths and values for all .plist files in /Library/Preferences
IFS=$'\n'; for domain in $(find /Library/Preferences -type f -name '*plist'); do
 grep -qE "(^|,)${domain}(,|$)" <<< "${skipDomains}" && continue
 echo "## Domain: $domain"; echo "## File Path: $(plb -f "${domain}")"
 # Adjust the info level/output below
 plb -V "${domain}"; echo
done

# Examples 1 & 2 exercises
 # Adjust the info level/output from -V to -CC or -C then try shallower crawls with -cc and -c
 # Output XML with `plb -x`, JSON with `plb -j`; both are speedier than crawling but with tradeoffs
 # `plb -p` prints quickly with PlistBuddy, while key/value pairs are easily spotted, paths are not

#3 Get the `file` type of all data nodes in your user prefs, you might find something interesting
IFS=$'\n'; for domain in $(plb -d); do
 grep -qE "(^|,)${domain}(,|$)" <<< "${skipDomains}" && continue
 echo "## Domain: $domain"
 echo "## Path: $(plb -f "${domain}")"
 #the sed at the end is if you use -CC, its removes the indents from the paths of data embedded plist
 for datapath in $(plb -cc "${domain}" | awk -F ' >>> ' '/data$/ {print $1}' | sed 's/^ *//'); do
  #get file type of data and key path
  echo "$(plb -F "$domain" "$datapath") <<< ${datapath}"
 done
 echo
done

# Example 3 notes:
 # `plb -cc` does not go into data plists, use `plb -CC` to search within data plists
 # Use the awk field separator `-F ' >>> '` to easily parse -cc/-CC output ($1 paths, $2 type)